How To Make A Charcuterie Board

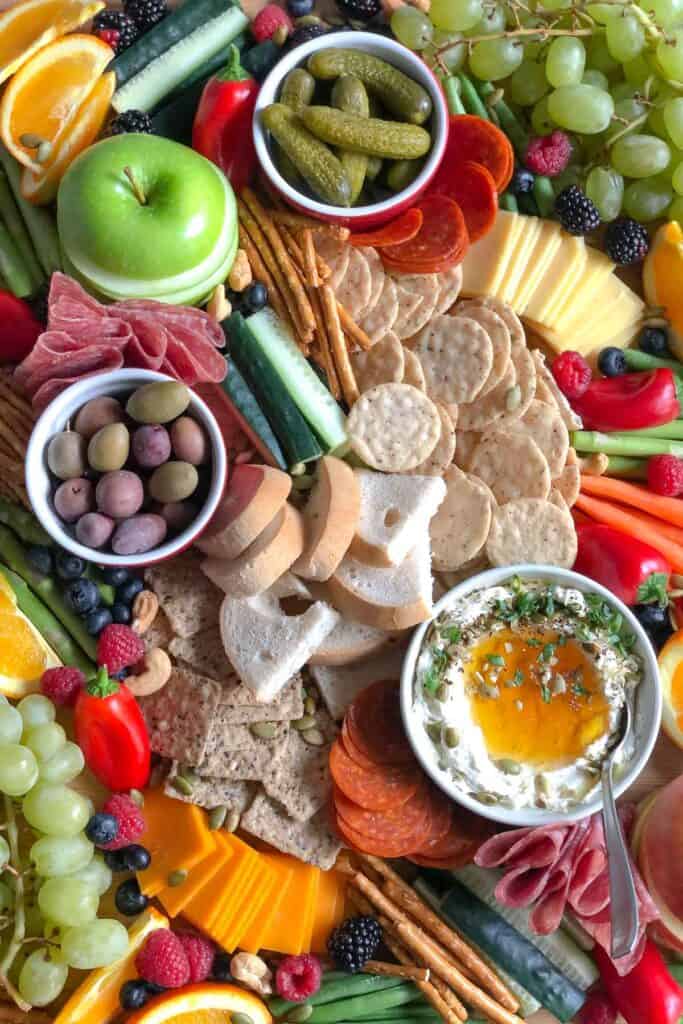
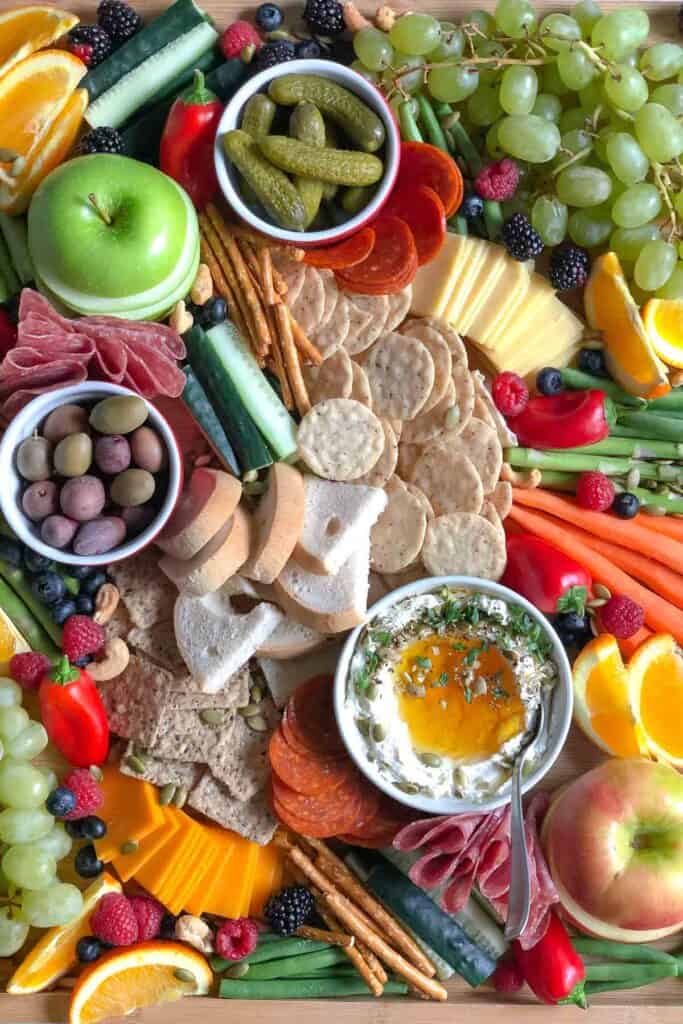
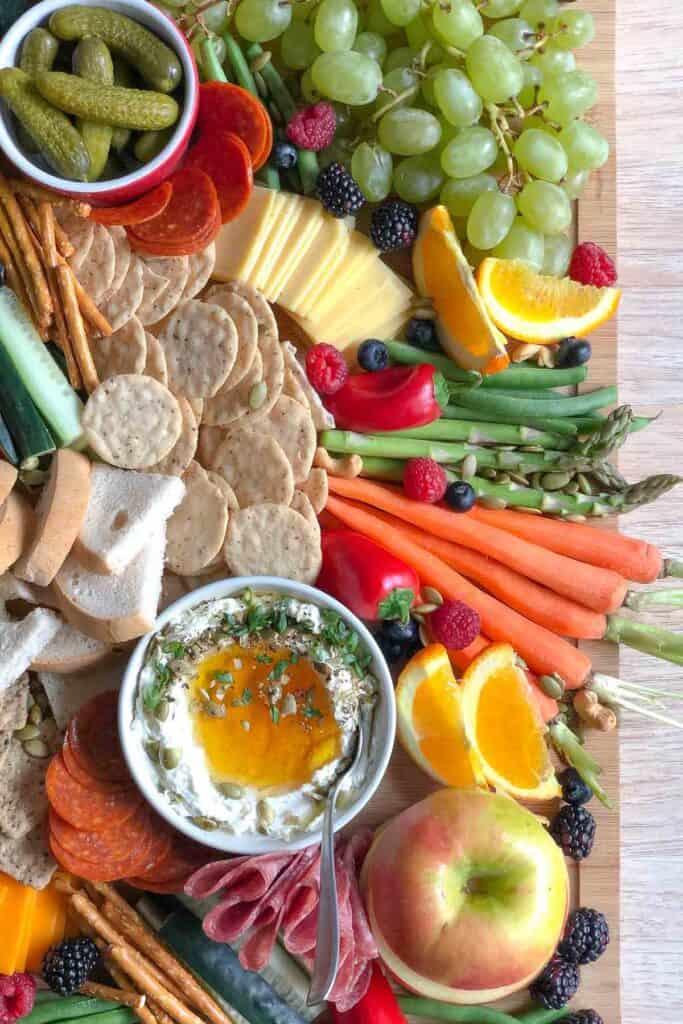
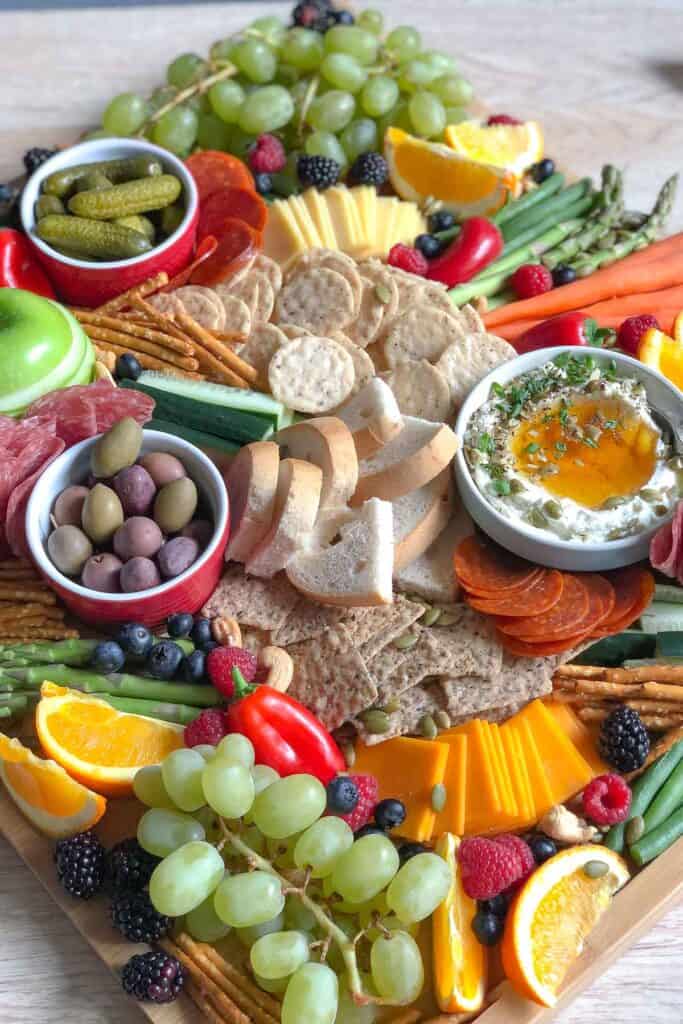

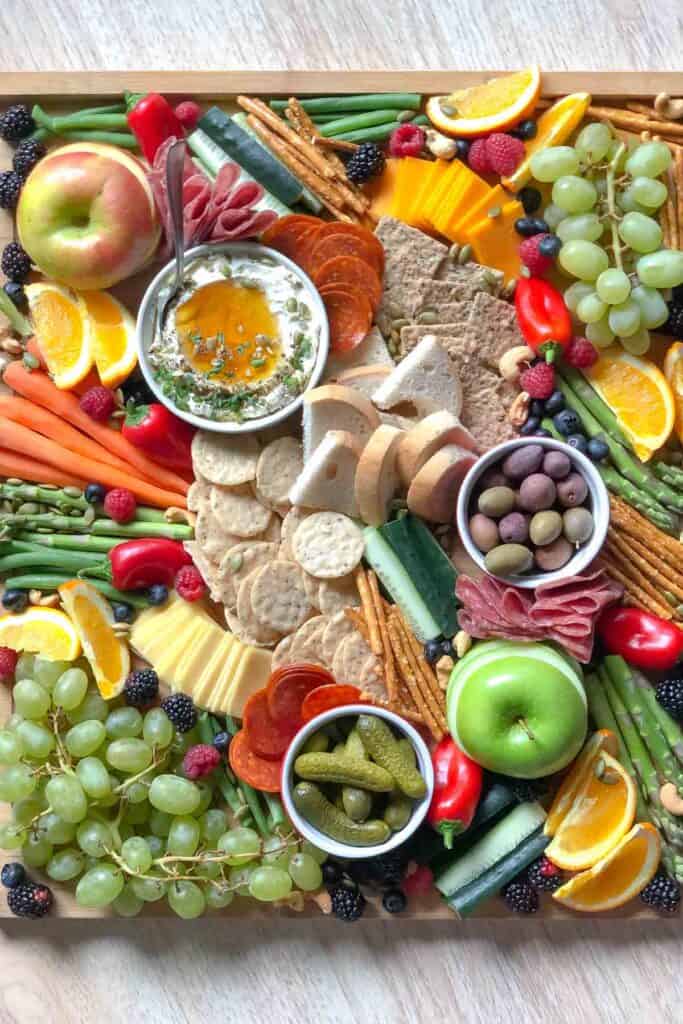


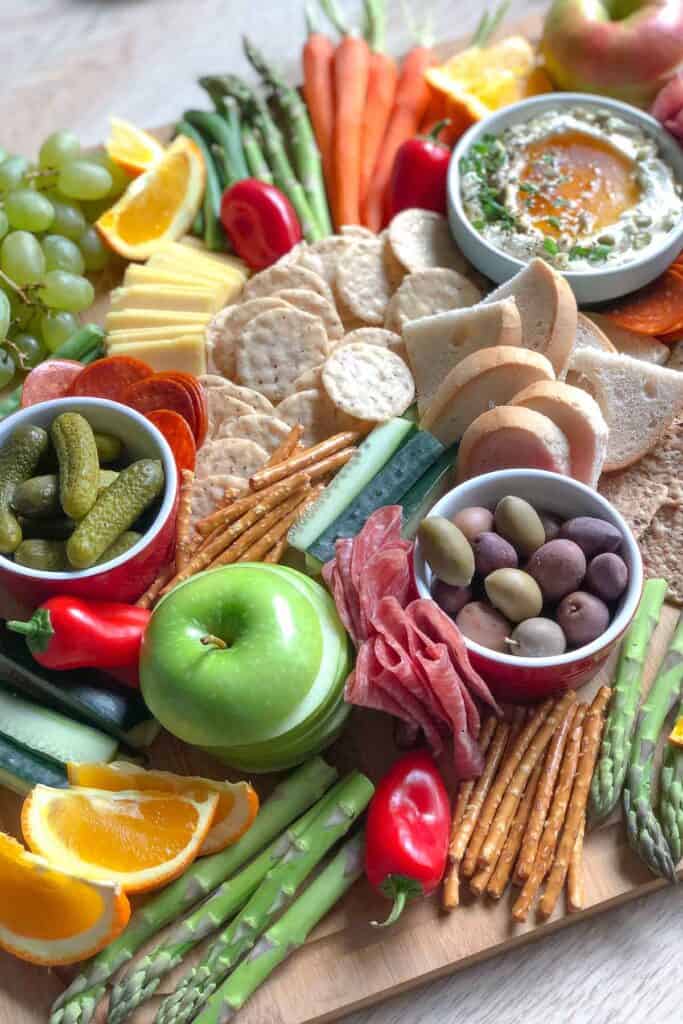


Charcuterie boards are all the rave during the holiday season. Not only is the word “charcuterie” difficult to pronounce, but these versatile boards are also great for get-togethers, football parties, church gatherings, picnics, or just because.
Charcuterie boards are incredibly easy to make and incredibly less expensive than purchasing a store-bought board. All you need are a few delicious ingredients and a tad bit of creativity! Use these simple tips to make a holiday charcuterie board or one that is perfect for smacking anytime that you want.
While every charcuterie board can be customized, I’m partial to the ingredients that are used below.
Take time to check out my Best Low Carb Halloween Jack-o-Lantern Charcuterie Board to see how fun and unique they can be!

What is a charcuterie board?
First I need to explain the history of charcuterie boards. They go way back to 15th-century France and the Roman Empire. I personally love that history and love the fact that they seem to be around to stay. So exactly what is it…

It’s a compilation of nuts, fruits, cheeses, meats, chocolate, veggies, and more. What used to start as a meat and cheese platter has now expanded to include a variety of favorite snack items.
There are dessert charcuterie boards, birthday charcuterie boards, and more! The great thing about these boards is that they can be customized to fit the occasion!
How to make a Charcuterie Board
The ingredients can vary, as they should vary. What I’m listing below as ingredients to make a charcuterie board are all optional and can be tweaked as necessary.
Ingredients:
- Slice meats of your choice (pepperoni, ham, turkey, salami, etc.)
- Cheese of your choice (cheddar, American, Monterey Jack, Pepper Jack, etc.)
- Crackers
- Pretzels
- Tortilla Chips
- 1/4 cup nuts or seeds
- Fruits (apples, cherries, sliced strawberries, grapes, etc.)
- Olives
- Vegetables (carrots, celery, etc.)
- mini gherkin pickles (optional)
- gluten-free crackers and bread
How To Make A Charcuterie Board
This isn’t a “one way is the only way” process, so have fun with it!
The easiest way to create a charcuterie board is to start with the middle of the board. I like to add meats and sliced cheese into the middle.

1) Start by placing your cheese on your board where you want them. Fan them out, so they take up more space and look nice.
2) Arrange your dip, sauce, or anything else in a small bowl (i.e. olives, miniature pickles, etc.) on the board. Try to place them so that they form a lopsided triangle across the board. The bowl size should complement the size of your board. For example, ramakins make great bowls for small boards.

3) Next, start arranging your fruits (minus the berries) and vegetables on the board. Place the largest items first and work down to the smallest. I placed my grapes first and my red snacking peppers last.

4) Then add your crackers and bread to the tray where there are large gaps. You don’t need to use a whole box, just a few handfuls. Save the rest of the crackers for refilling if needed while serving.
5) Add the meat to the board in a few clumps in between items. I squeezed mine in between the dips and crackers and between some grapes and other veggies. You want to squeeze them in so that they don’t unfold.

6) Finally, fill in any gaps on your board with berries, nuts, and seeds. Your charcuterie board is all done and ready to serve. Be sure to cover your board until you are ready to serve it to keep everything fresh.
You don’t have to add meat and cheese if you don’t want to. You can stick to just fruits, veggies, or anything else that you’re craving.

I’m a huge fan of making a homemade dip and adding it to the snack board. Don’t be afraid to add your favorite dip (or dips) to compliment your items on the board!

Homemade Dip
One of my favorite dips is a Feta cheese dip that is rich and creamy. It’s delicious and takes hardly any time to make.
You’ll need the following:
- 4oz crumbled feta cheese
- 4oz softened cream cheese
- 1 Tbsp. olive oil
- 1/2 tsp minced garlic
- 1/2 tsp dried basil
- 1/4 cup sugar-free honey substitute
- garnish: chopped nuts, coarsely ground pepper, and green onions

1) Add all the ingredients except the honey and garnishes into a food processor or blender. Mix for 2 minutes until the dip is smooth. You can also use a hand mixer if needed.
2) Scoop the dip into a small bowl for serving.

Use the back of a spoon to form a well in the middle of the dip and fill it with sugar-free honey. Garnish and enjoy.
Every time you dip, you’ll get that cheesy goodness and some flavored honey with every bite.

Tips for making a Charcuterie Board
Don’t stress! The whole point is to create a beautiful snack board full of awesome foods.
Remember that there is no wrong way to make a charcuterie board. Have fun, change things up, and make it your own.
To save time, prep and chop up the fruits and veggies before making the board. This will be a fast way to get it set up and ready to enjoy.
Your board can be as big or as small as you want. Keep it simple or go eccentric!

How far in advance can you make a charcuterie board?
The furthest in advance that I would recommend making a charcuterie board is 24 hours. This is because you’re using a lot of fresh ingredients that need to be eaten soon.
If you do make it in advance, make sure that you keep it stored in the fridge until you’re ready to eat. Cover it with plastic or store it in a container with a lid.
How much cheese and charcuterie per person?
It can be hard to decide how much food to put on a charcuterie board. A good rule of thumb is to prepare 2 ounces of meat and cheese per person and then add the other food items as extra.
What kind of crackers for charcuterie?
This all just depends on your needs. Wafer crackers are super good, but cheese crackers add flavor, too!
You can even add gluten-free crackers for anyone who may have a gluten allergy. I have some great Everything Bagel Keto Crackers that would be perfect!
If you don’t want to add crackers, don’t forget that adding toasted bread or pretzels is a great idea as well.
What wood should not be used for charcuterie boards?
Stay away from using soft woods. It’s not recommended to use platters made out of ash wood for serving food as it can hold scents and food can seep into soft woods contaminating them for future use.
It’s best to choose a board that has been prepared and sealed so that it’s easy to clean.
Making a charcuterie board is so much fun! Make sure to add all your favorite ingredients and have fun creating the perfect snack board!
More Snack Ideas

How To Make A Charcuterie Board
You'll love how simple it is to customize your charcuterie board!
Ingredients
- Slice meats of your choice (pepperoni, ham, turkey, salami, etc.)
- Cheese of your choice (cheddar, American, Monterey Jack, Pepper Jack, etc.)
- Crackers
- Pretzels
- Tortilla Chips
- 1/4 cup nuts or seeds
- Fruits (apples, cherries, sliced strawberries, grapes, etc.)
- Olives
- Vegetables (carrots, celery, etc.)
- mini pickles (optional)
- gluten-free crackers and bread
Instructions
1) Start by placing your cheese on your board where you want them. Fan them out so they take up more space and look nice.
2) Arrange your dip and anything in a bowl you board. Try to place them so that they form a lopsided triangle across the board.
3) Next start arranging your fruits(minus the berries) and vegetables on the board. Place the largest items first and work down to the smallest. I placed my grapes first and my red snacking peppers last.
4) Then add your crackers and bread to the tray where there are large gaps. You don't need to use a whole box, just a few handfuls. Save the rest of the crackers for refilling if needed while serving.
5) Add the meat to the board in a few clumps in between items. I squeezed mine in between the dips and crackers, and between some grapes and other veggies. You want to squeeze them in so that they don't unfold.
6) Finally, fill in any gaps on your board with berries, nuts, and seeds. Your charcuterie board is all done and ready to serve. Be sure to cover your board until you are ready to serve it to keep everything fresh.

How To Make A Charcuterie Board
You'll love how simple it is to customize your charcuterie board!
Ingredients
- Slice meats of your choice (pepperoni, ham, turkey, salami, etc.)
- Cheese of your choice (cheddar, American, Monterey Jack, Pepper Jack, etc.)
- Crackers
- Pretzels
- Tortilla Chips
- 1/4 cup nuts or seeds
- Fruits (apples, cherries, sliced strawberries, grapes, etc.)
- Olives
- Vegetables (carrots, celery, etc.)
- mini pickles (optional)
- gluten-free crackers and bread
Instructions
1) Start by placing your cheese on your board where you want them. Fan them out so they take up more space and look nice.
2) Arrange your dip and anything in a bowl you board. Try to place them so that they form a lopsided triangle across the board.
3) Next start arranging your fruits(minus the berries) and vegetables on the board. Place the largest items first and work down to the smallest. I placed my grapes first and my red snacking peppers last.
4) Then add your crackers and bread to the tray where there are large gaps. You don't need to use a whole box, just a few handfuls. Save the rest of the crackers for refilling if needed while serving.
5) Add the meat to the board in a few clumps in between items. I squeezed mine in between the dips and crackers, and between some grapes and other veggies. You want to squeeze them in so that they don't unfold.
6) Finally, fill in any gaps on your board with berries, nuts, and seeds. Your charcuterie board is all done and ready to serve. Be sure to cover your board until you are ready to serve it to keep everything fresh.